
Last week we looked at creating a link that opens in a modal by adding a few attributes to the link. We are going to take this one step further this week by creating the modal in a custom module. This will give you much more flexibility over what you include in the modal.
Create the module info file
In this example, I’m going to call the module custom_modal.
First, create the module info.yml file in the module folder (called custom_modal). The custom_modal.info.yml file provides basic information to Drupal about the module. Add the following to custom_modal.info.yml:
name: Custom Modal
type: module
description: Display a modal
core: 8.x
package: Custom
Create the path for the modal
Last week, you added a link to a block and clicking on the link triggered the modal. Here is a recap of that link:
<p><a class=“use-ajax” data-dialog-type=“modal" href="/search/node">Search</a></p>
With a custom module, you will need to create the link in code and clicking on that link will trigger the modal. To do that in Drupal 8, you can register a route.
Create the route file, called custom_modal.routing.yml. In custom_modal.routing.yml, add the following route:
custom_modal.modal:
  path: 'modal-example/modal'
  defaults:
    _title: 'Modal'
    _controller: '\Drupal\custom_modal\Controller\CustomModalController::modal'
  requirements:
    _permission: 'access content'
When the user clicks on modal-example/modal, the modal will be triggered. The controller is '\Drupal\csc_modal\Controller\CustomModalController::modal'. That means that when this path is called, this controller will be called.
Create the controller
Next you are going to create the controller mentioned above. In the root of the custom_modal folder create:
- a folder called
src - a folder inside
srccalledController - a file inside
ControllercalledCustomModalController.php
And add the following code to CustomModalController.php:
<?php

/**
 * @file
 * CustomModalController class.
 */

namespace Drupal\custom_modal\Controller;

use Drupal\Core\Ajax\AjaxResponse;
use Drupal\Core\Ajax\OpenModalDialogCommand;
use Drupal\Core\Controller\ControllerBase;

class CustomModalController extends ControllerBase {

  public function modal() {
    $options = [
      'dialogClass' => 'popup-dialog-class',
      'width' => '50%',
    ];
    $response = new AjaxResponse();
    $response->addCommand(new OpenModalDialogCommand(t('Modal title'), t('The modal text'), $options));

    return $response;
  }
}
This creates an Ajax command to open a dialog modal. When the modal is open, it will contain the text “This modal text”.
You could use this to show anything else you want in a modal. For example, you might decide to define a form so that users can complete an action and show that in the modal.
Create the block
And finally, you can create the block for this, which will contain the button to call the modal.
In the root of the custom_modal folder create:
- a folder inside
srccalledPlugin - a folder inside
PlugincalledBlock - a file inside
BlockcalledModalBlock.php
And add the following code to ModalBlock.php:
<?php
/**
 * @file
 * Contains \Drupal\custom_modal\Plugin\Block\ModalBlock.
 */

namespace Drupal\custom_modal\Plugin\Block;
use Drupal\Core\Block\BlockBase;
use Drupal\Core\Url;
use Drupal\Core\Link;
use Drupal\Component\Serialization\Json;

/**
 * Provides a 'Modal' Block
 *
 * @Block(
 *   id = "modal_block",
 *   admin_label = @Translation("Modal block"),
 * )
 */
class ModalBlock extends BlockBase {
  /**
   * {@inheritdoc}
   */
  public function build() {
    $link_url = Url::fromRoute('custom_modal.modal');
    $link_url->setOptions([
      'attributes' => [
        'class' => ['use-ajax', 'button', 'button--small'],
        'data-dialog-type' => 'modal',
        'data-dialog-options' => Json::encode(['width' => 400]),
      ]
    ]);

    return array(
      '#type' => 'markup',
      '#markup' => Link::fromTextAndUrl(t('Open modal'), $link_url)->toString(),
      '#attached' => ['library' => ['core/drupal.dialog.ajax']]
    );
  }
}
This is creating a link for the block using the URL directly from the route that was defined earlier in custom_modal.routing.yml:
$link_url = Url::fromRoute('custom_modal.modal');
It then sets the attributes for that link. You’ll notice that this code sets a CSS class of use-ajax and a data-dialog-options attribute with a value of modal:
 'attributes' => [
        'class' => ['use-ajax', 'button', 'button--small'],
        'data-dialog-type' => 'modal',
This is the same as the link you were shown last week:
<p><a class="use-ajax" data-dialog-type="modal" href="/search/node">Search</a></p>
The code then creates the link from using the $link_url:
'#markup' => Link::fromTextAndUrl(t('Open modal'), $link_url)->toString(),
Open modal will be the anchor text for the link, which you can change to what ever you want.
And finally it attaches Drupal’s dialog library, which uses jQuery UI dialog:
'#attached' => ['library' => ['core/drupal.dialog.ajax']]
Add the block to a region
Head on over to the Extend menu in your Drupal site and enable this module (or use Drush).
Now you need to enable the block and add it to a region. Head over to Block Layout and add it to a region of your choice. In this example, I’m going to add it to sidebar first.
After clicking on the Place Block button next to the region, you can search for the modal block you just created by its name (“modal block”).
Head back to the main site and you should see the block in the side bar.
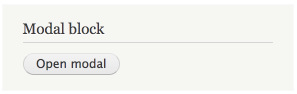
And this will open the modal!
Even though this example doesn’t do anything other than display text in a modal, it gives you the tools to create your own modal in code and do a lot more in the modal - such as add a custom form. We’ll be looking at doing just that in the near future (stay tuned). We’ll also be looking into how to gracefully deal with users who don’t have Javascript enabled.
