
Developing custom modules in Drupal 8 is a daunting prospect for many. Whether you’re still learning Drupal 7 module development or are more experienced, Drupal 8 represents a significant shift in the underlying architecture and the way modules are constructed.
And now is the time to learn Drupal 8 module development. It is new, it is fresh and it brings a lot more power to sites of all sizes. Drupal has so many cutting edge features that would previously only have been available to enterprise applications. Drupal 8 is going to revolutionise the way we build websites. Now we have an enterprise level application that we can all use and benefit from - this is a huge boost for our clients and employers.
If you are feeling anxious about it, the most important thing is to start somewhere. Once you start developing Drupal 8 modules, the new concepts will start to click. And getting started is not as difficult as you might fear. It can be made easier by a new tool - the Drupal Console. The Drupal Console can be used to generate a lot of the boilerplate code and files that you need to create Drupal 8 modules.
Before we get started, let’s take a moment to thank everyone who has been involved in making Drupal 8 and the Drupal Console. It’s an exciting and fun time to be involved in Drupal.
Let’s get started.
What is the Drupal Console?
Drupal Console is a new Command Line Interface (CLI) for Drupal, built specifically for Drupal 8 (based on the Symfony Console component). In many ways, the Drupal Console is similar to Drush. You can use it to rebuild caches, connect to databases and install modules. Unlike Drush, Drupal Console can also be used to generate module files’ boilerplate code out of the box with no other modules needed. This saves you a lot of time - giving you more time to focus on the business logic of your module.
Installing
You need to run three commands to install the Drupal Console.
- Use curl to get drupal.phar: curl https://drupalconsole.com/installer -L -o drupal.phar
- Move it to your local bin, so that it can be used anywhere on your system: mv drupal.phar /usr/local/bin/drupal
- Make it executable: chmod +x /usr/local/bin/drupal
If you get stuck installing it, or want more information, check out the Drupal Console website. There are installation instructions for Mac/Linux here and Windows here.
Run
Now you should be able to run the Drupal command. You will see a list of basic commands that you can run. To run it, simply run drupal in the command line.

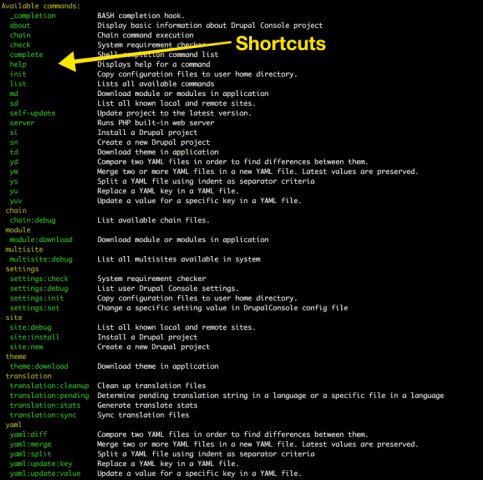
See available commands
Run drupal list to see available commands. You can make and install a whole new site with Drupal Console, but in this series, we are focused on creating new modules, so I’m going to assume you already have a Drupal 8 site up and running in the development environment of your choice.
Shortcuts
Shortcuts in Drupal Console are like aliases in Drush and you can use them for some commands to save on time typing. For clarity during this series, I’m going to stick with the full commands.
More commands in existing Drupal project
To use Drupal Console with your existing Drupal 8 site, simply change to that folder in the command line. When you use drupal list within a Drupal directory, you should see many more commands, including the generating modules and connecting to the database.
In my case, my Drupal 8 demo site is in a folder called drupal8 inside the Sites folder. So I’ll run the following to get to the root of my Drupal 8 site:
$ cd ~/Sites/drupal8
Generate module command
You can generate a new custom module with the generate:module command, or its shortcut gm.
Generating the welcome module
During this series you are going to create a module called welcome. This module will do the following things:
- Create a custom path and return a message
- Display a message when users log in
- Make the message configurable with an admin form
- Create a custom block and make it configurable
All you need to do to kick it off is run the generate:module command.
$ drupal generate:module
Give the module a name of Welcome hit enter for all of the options to accept the default with the exception of:
- Enter module description: Display a message when a user logs in
- Do you want to generate a .module file: yes
You should then see the basic welcome folder in your site under /modules/custom with the following files:
- composer.json
- welcome.info.yml
- welcome.module
The info file
The Drupal Console has created an info yml file to tell Drupal that your module exists. This is a required file and is similar to creating a .info file in Drupal 7.
Open welcome.info.yml and you will see that it contains the following:
name: Welcome
type: module
description: Display a welcome message to users
core: 8.x
package: Custom
Install the module
The module now exists but it is not enabled. You don’t need to go to the module page to enable it, you can install and enable the welcome module using the module:install command:
$ drupal module:install welcome
This will install the module and automatically rebuild the cache.
The obligatory hello world page
Everyone seems to love a hello world page! So let’s create one. We want a page on a custom path that returns the message “Welcome!”.
To do that, we need two things:
- A controller, which will return the message
- A route, which will map a URL to the controller
You can use the Drupal Console to create both the controller and the route using the generate:controller command.
$ drupal generate:controller
Next, you will get a serious of prompts. Type in the following:
Enter the module name: welcome Enter the Controller class name: WelcomeController Enter the Controller method title (leave empty and press enter when done): Welcome Controller Enter the action method name: welcome Enter the route path: /welcome Enter the Controller method title (leave empty and press enter when done): (empty) Do you want to generate a unit test class (yes/no): no Do you want to load services from the container (yes/no): no Do you confirm generation? (yes/no): yes
Drupal Console will then generate the following files for you:
/modules/custom/welcome/src/Controller/WelcomeController.php
/modules/custom/welcome/welcome.routing.yml
And it will rebuild the routes for you. This is similar to rebuilding the menu cache in Drupal 7.
We will dive into the code that was generated in WelcomeController.php and welcome.routing.yml tomorrow, but for the time being, take a look at the route path that you added:
Enter the route path: /welcome
Remember earlier I said that the route maps the URL to the controller? This means that Drupal Console has added a route for us, mapped it to the controller which handles the output and has created a path of: welcome. Now if you go to /welcome on your site, you should see the following page.
Without writing a line of code, you have just created a custom path and returned some output!
This tutorial is lesson one in my new Starting Drupal 8 Module Development course. If you would like to get access to all 7 of the lessons, checkout the signup Starting Drupal 8 Module Development page.
